
Understanding Textures And Optimizing Materials For Mobile VR in UE 5.1 - Part 1
When it comes to squeezing performance out of your VR project, it can be difficult to say the least. In this post im going to show you a few techniques (no perticular order) to squeeze the most out of your materials and hopefuly show you a couple of things you might not have thoughts about when it comes to material optomization in UE5 ( all these settings are valid/work for UE4).
Trim Sheets, Atlas Textures, and Tilling Textures.
Chances are, when it comes to asset creation for games you’ll have heard about trim sheets, texture atlases, and tiling textures. If you haven’t, trim sheets and atlases are both quite similar to each other but both provide different results. Tiling textures are exactly as they sound, they can repeat on both the X and Y axis.
T rim sheets and atlases work by adding/packing multiple images/textures into a single texture map for multiple assets to utilize. This saves on shader count and Draw calls when in game, I’ll go over these in more detail below.
What are trim sheets?
Trim sheets are an extremely useful and helpful way of texturing multiple 3D assets with just a single texture sheet. By combining multiple smaller textures. They are typically created to tile on the X or Y Axis (Not both). This makes them extremely robust for texturing and extremely efficient for game performance. Especially when it comes to managing texture memory in game engines, reducing the number of draw calls within a level, and improving load times for levels with lots of assets. You can see an example of how trim sheets look below.
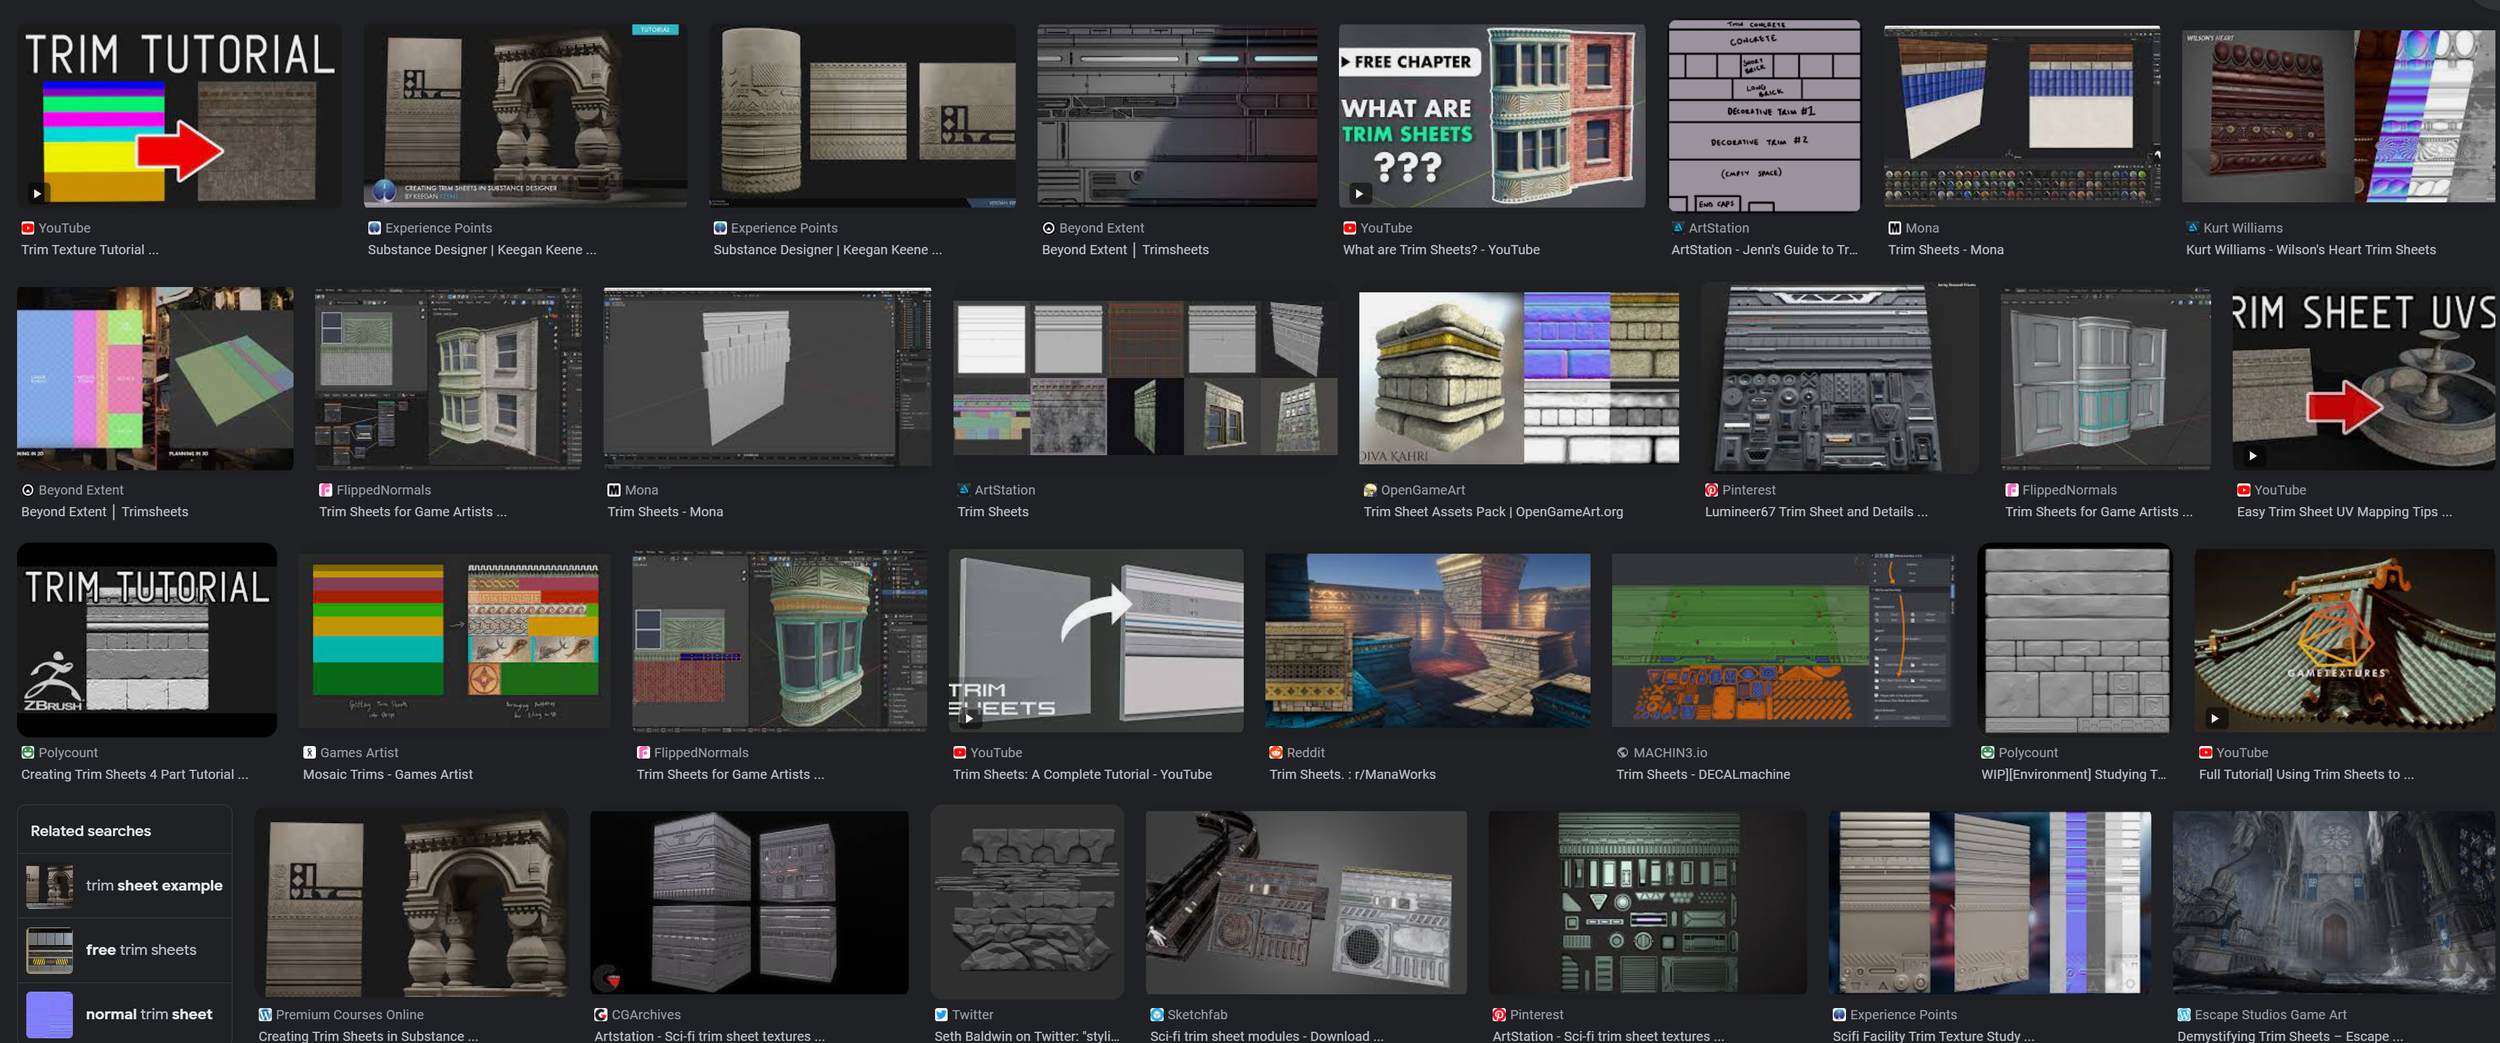
Trim Sheet Example (Google)
By creating a trim sheet on the horizontal axis, Different portions of a 3D model can be UV unwrapped to tile in that direction (UVs can also be rotated). You can see in the image below how r/ManaWorks over on Reddit is using trim sheets for one of their environments. By creating a single tilling texture they can create a repeating floor pattern, followed by their second texture (a Trim sheet). By using two materials, they have managed to texture almost all of there environment.

Make it stand out
What are Atlas textures?
Atlas Textures Also called packed textures or decal sheets, are similar to trim sheets but work slightly differently when it comes to layout and creation, they also don’t typically tile on either axis. Atlases allow you to build/create single or multiple assets using a single texture. While also helping to manage texture memory. They can be used to create larger scenes and assets. Because the textures themselves don’t tile by default, you will need to be careful about texel density and resolution when creating assets with them as textures will begin to pixelate if scaled.
It is possible to build a custom material shader in both Unreal Engine and unity to tile specific portions of an Atlas which is a great way to get extra performance.

Atlas Texture Example (Google)
Atlas textures or packed textures are typically used for environment modeling and large props like buildings and structures. You can see how Stefan Morrell used a texture atlas created from photographic images to uv unwrap a set of modular pieces and constructed them to create a building facade.

Texture Atlas used to texture a full building.
http://wiki.polycount.com/wiki/File:Stefan-Morrell_modular-texture.jpg

How Super Mario Bros on NES used Atlas Textures
https://www.spriters-resource.com/nes/supermariobros/sheet/52571/
What are tilling textures?
Tiling textures are single images that can be tilled in both the X and Y axis. Tiling textures can be created for any material out there. Any game you’ve ever played will use some form of tiling textures. They are fantastic however you can only have one material displayed on the texture. These should be saved for when texturing large, scalable assets. Such as terrain, rocks, and flooring.
https://quixel.com/megascans/home/
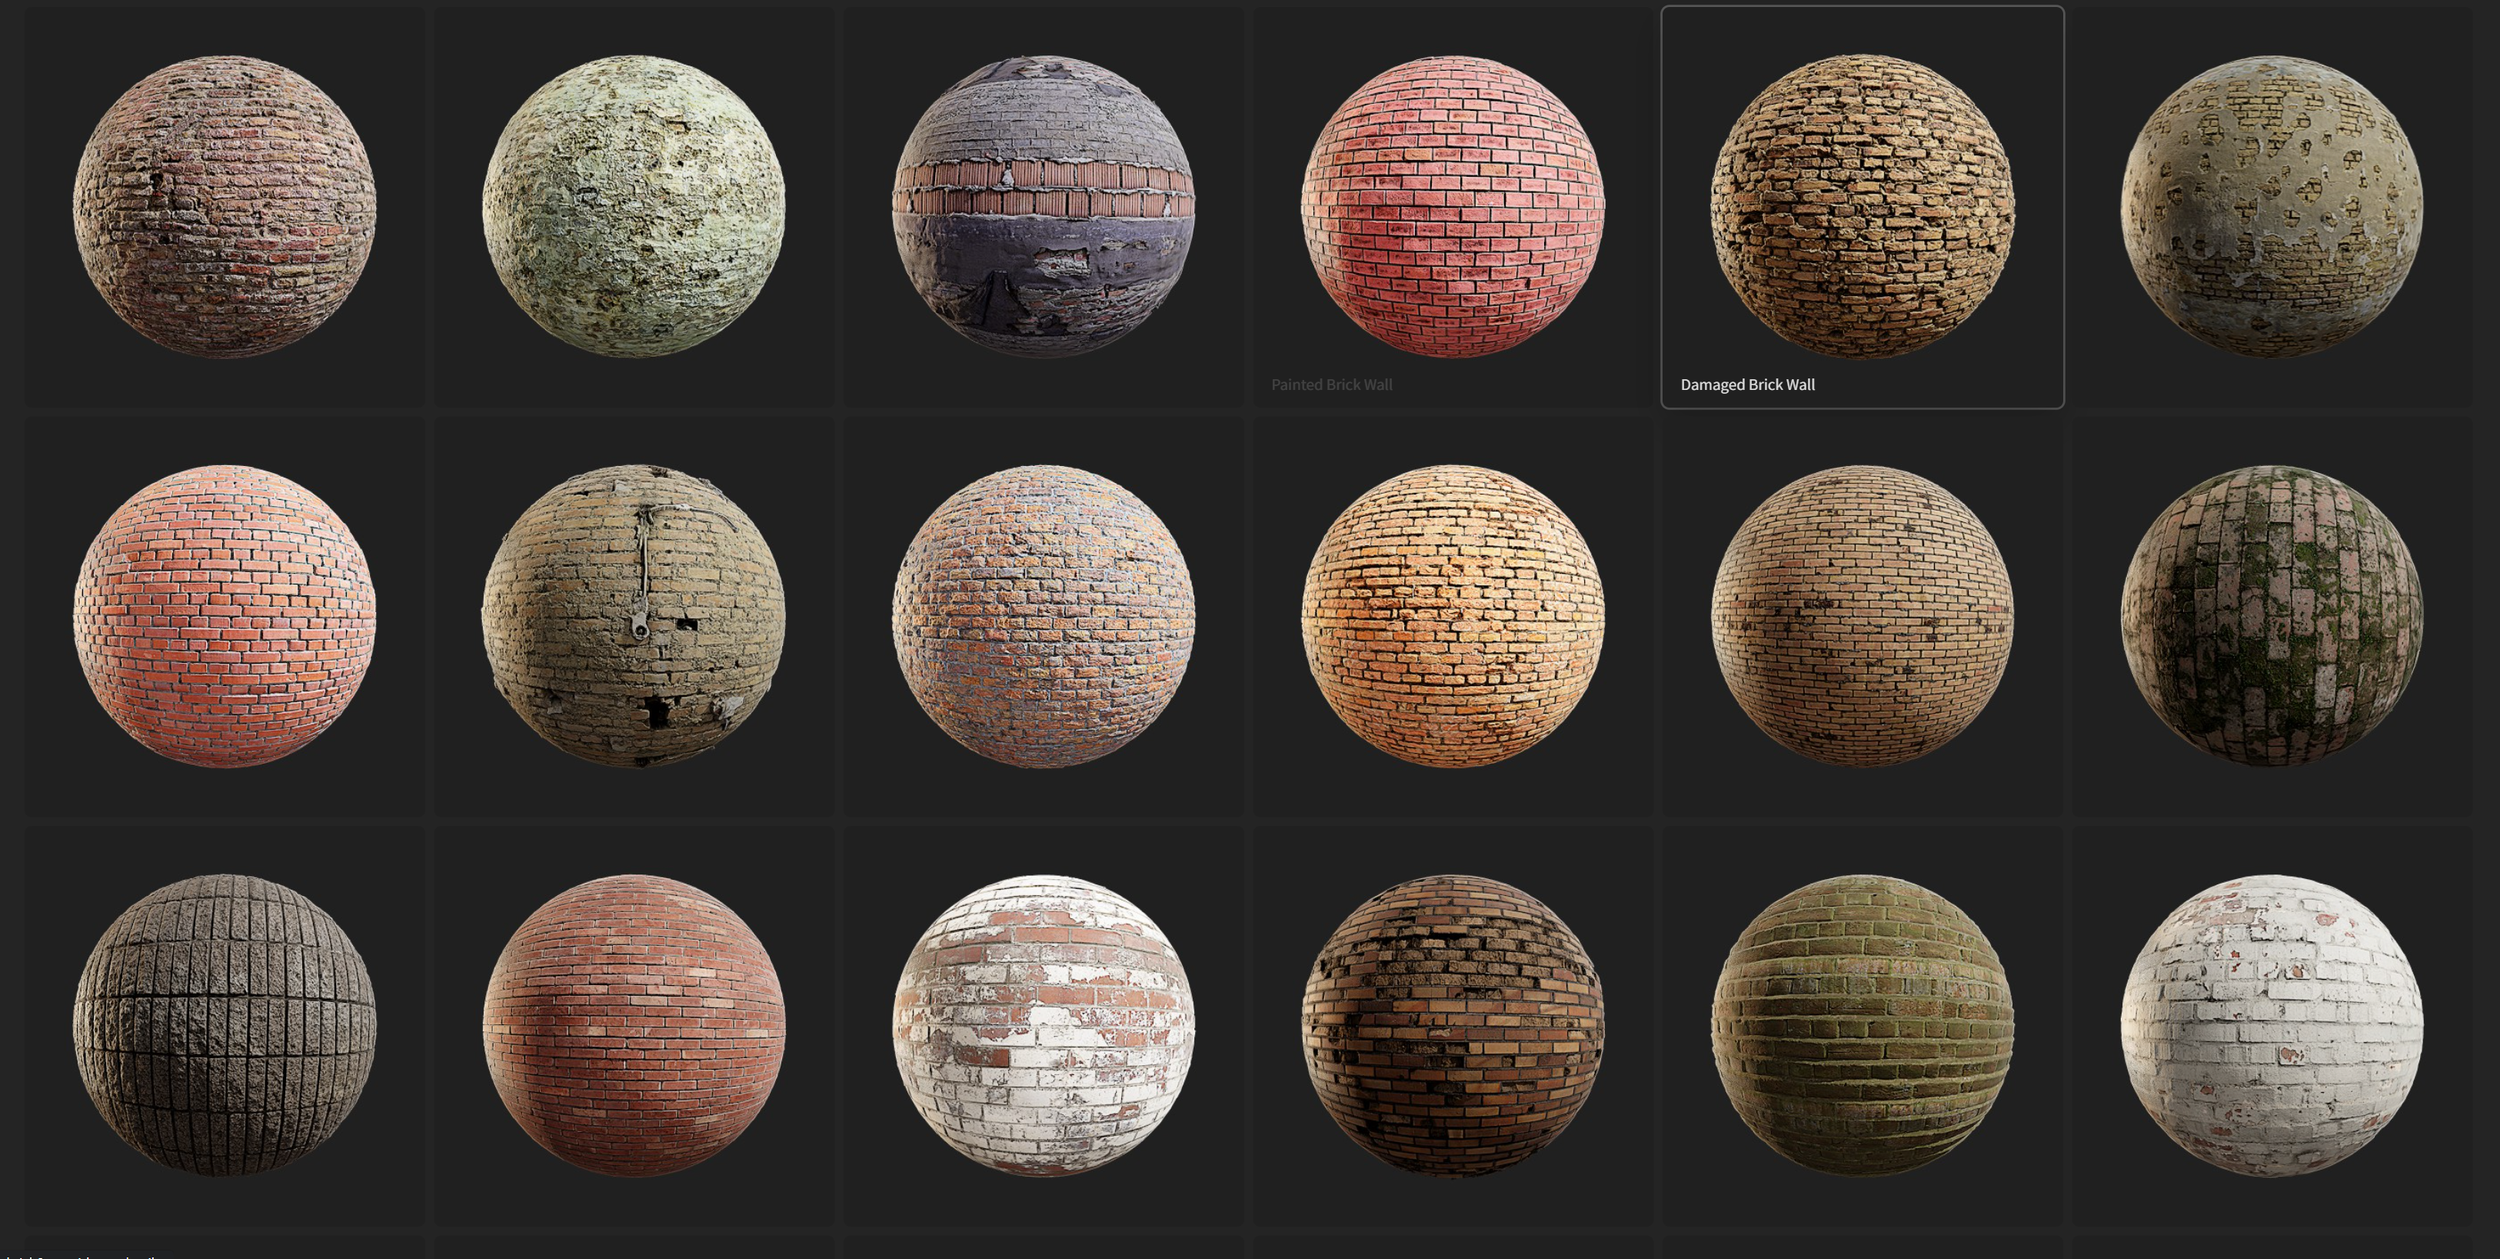
https://quixel.com/megascans/home?category=surface&category=brick
Tiling textures can still be used to create smaller individual assets but they are still normally related to environment props. You can see in the image below how Naughty Dog used tilling textures to bring life to Andres Rodriguez’s Colony Cliffs building asset. Pay attention to the moss on the roof, interior walls, and exterior stone. They do use vertex painting to add variation but this doesn’t work well on mobile so we won’t be covering it.

Andres Rodriguez, Colony Cliffs building Asset.
https://www.artstation.com/artwork/n2k2r
So how do we know what texture type to use?
Simply put, there’s no straight answer. 2D games can get away with using only texture atlases, but 3D games on mobile, desktop, or console. Will most likely require you to use 1 (Trim sheets) or all of them in some form. It just breaks down to where you think the specific texture type can be best utilized for repetition and asset creation. To get an idea of where you can use textures, here are some videos I recommend watching.
Recommended Homework
The Ultimate Trim: Texturing Techniques of Sunset Overdrive
Environment Art in Wolfenstein II - The New Colossus
Texturing a Hyper-Reality Experience with ILMxLAB - Star Wars Secrets of the Empire
Texturing Uncharted 4: A Matter of Substance (presented by Allegorithmic)
Inside ILMxLAB: Making Star Wars Vader Immortal! (Oculus Quest 2)
If you don’t watch any of the above links. Watch the bellow video.
PBR (Physically-Based Rendering)
For the rest of this blog post, we’re going to focus on PBR or physically-based Rendering materials. PBR refers to a material pipeline that allows 3D engines to simulate any kind of physical material, allowing 3D models, environments, and 3D engines to look incredibly realistic or highly stylized. These PBR materials work by combining multiple images (Textures) each containing different information to produce a desired result.
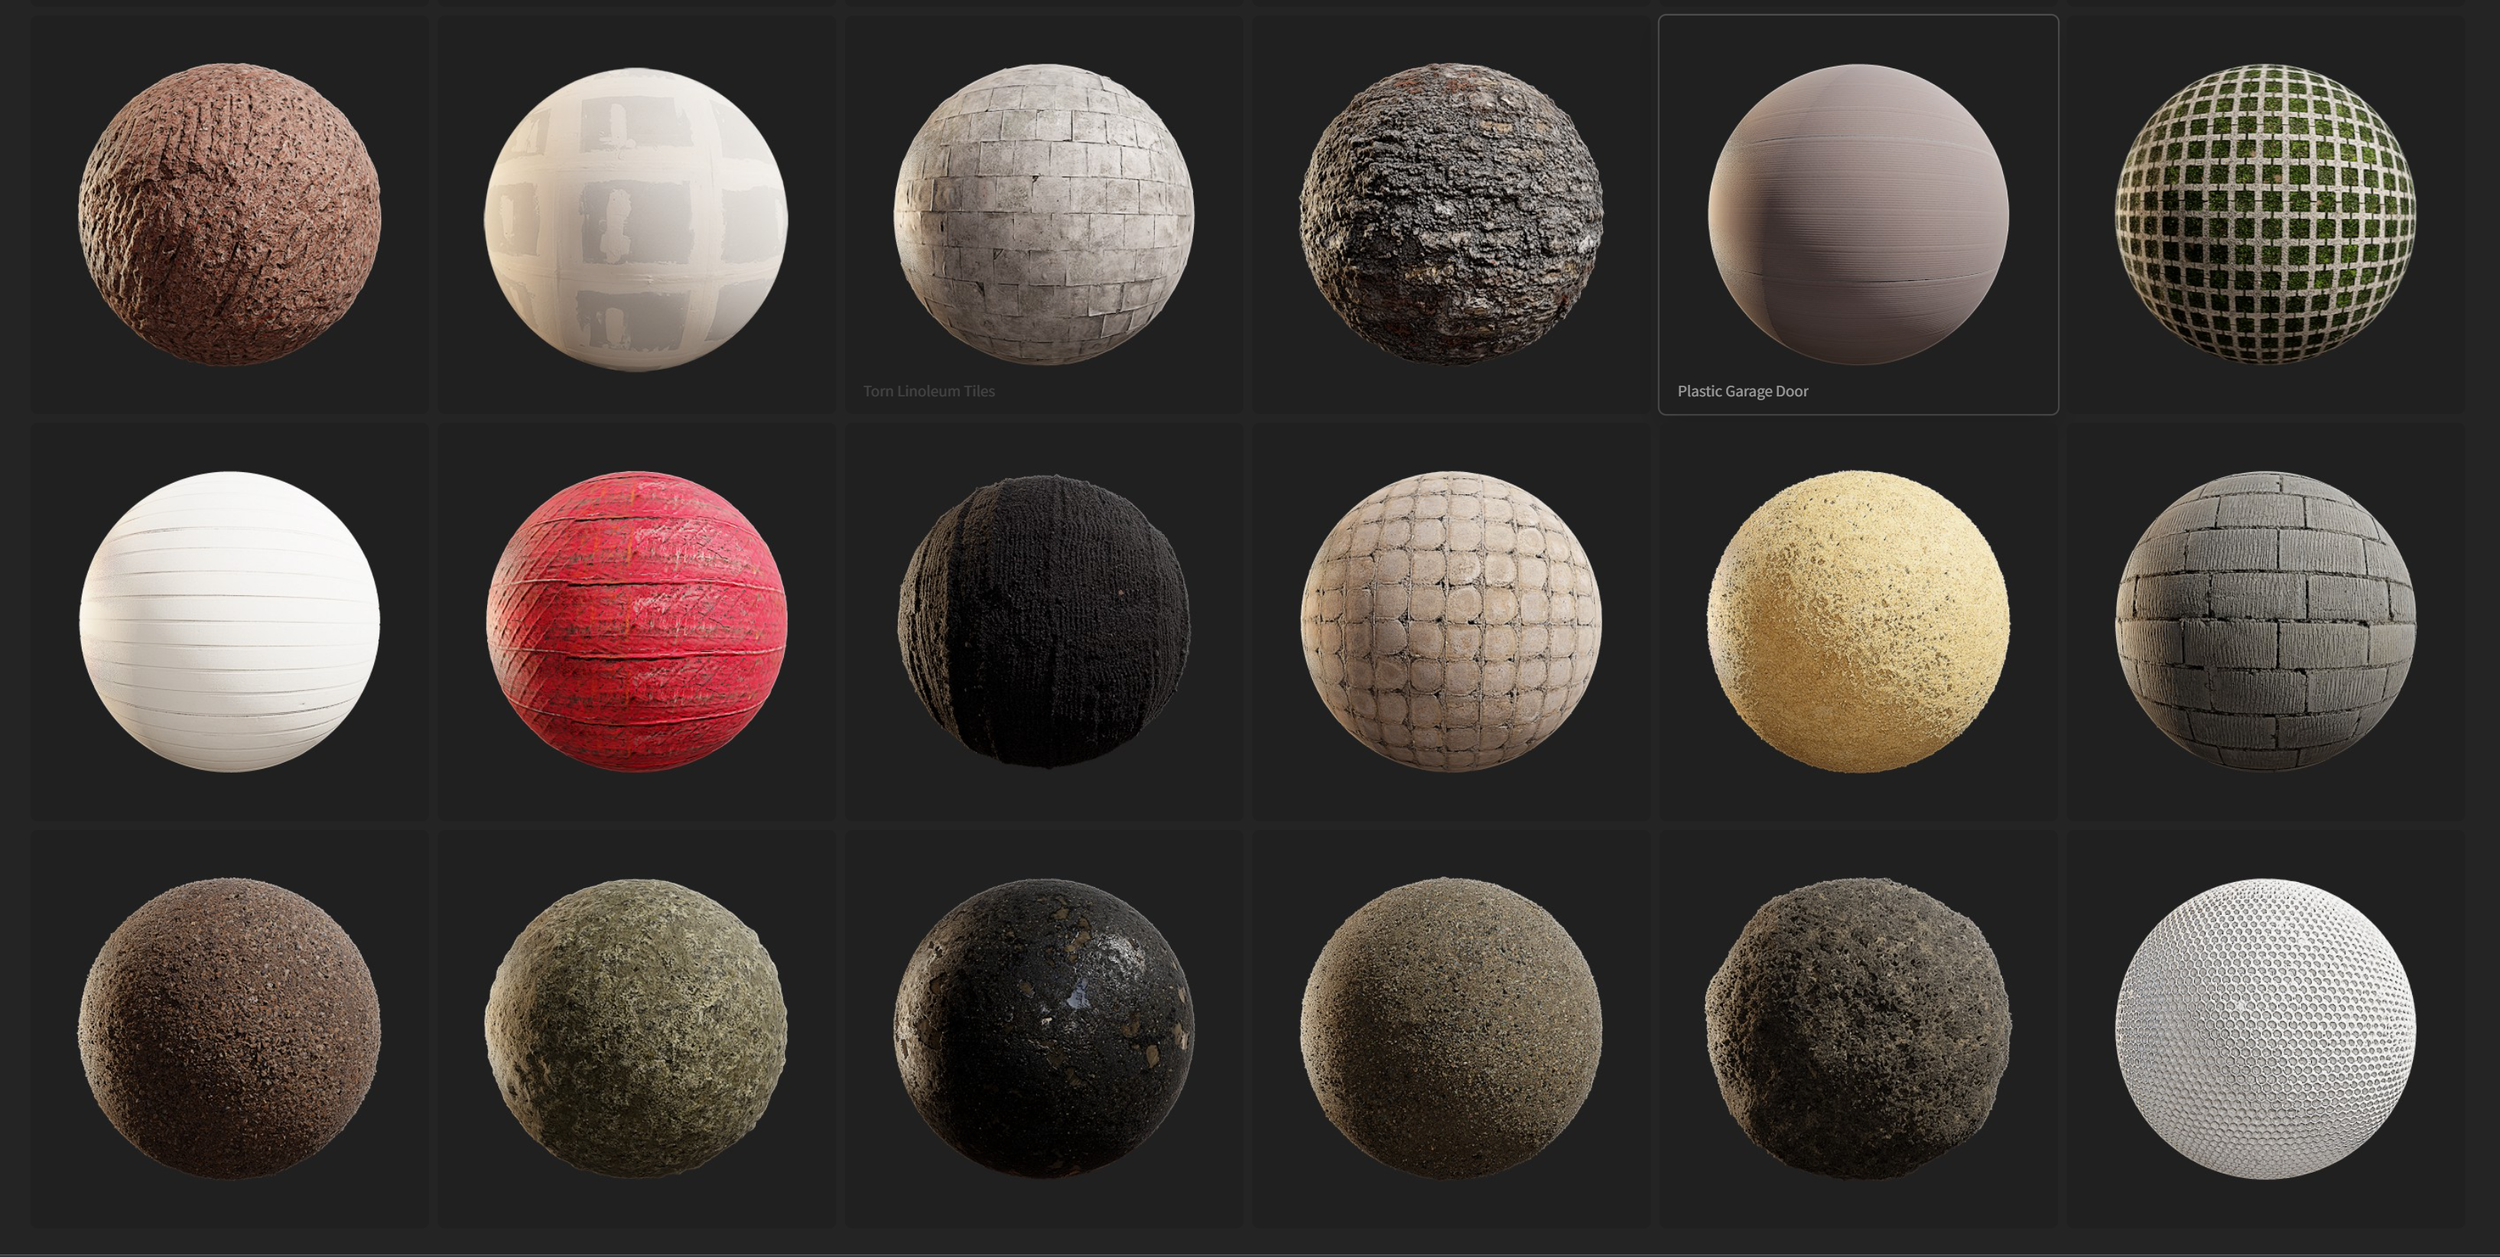
To see how complex PBR materials can be, I recommend taking a look through the Quixel Mega Scans Library (It’s Free).


Im going to cover how PBR Materials are created as it helps to understand how we can optimize them for mobile later on.
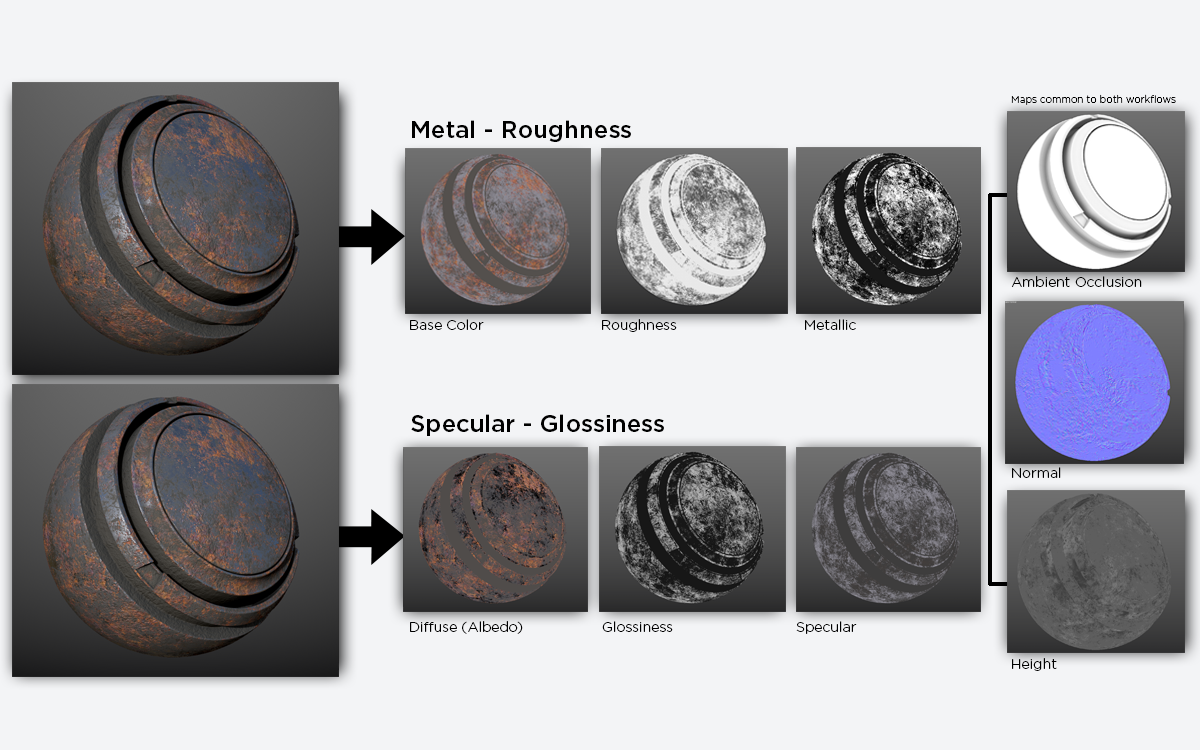
Texture Types
So we have briefly covered PBR materials and what they are, but how are they created?
When creating materials in games, we often combine a variety of textures to create these PBR Materials. The most common being:
- Base Color / Albedo
- Normal
- Roughness
- metallic
- AO (Ambient Occlusion)
- Opacity
But PBR materials also support:
- Height
- Specular
- Refraction
- Emmisive
I won’t cover all the texture types available to use as most mobile devices don’t support them when using Forward Rendering (that’s a different blog post). This is because they can make rendering too expensive. So here’s a brief rundown of the texture types and what they do. To demonstrate the different maps, I’m going to use these textures from Textures.com

Base Colour / Albedo
The base color is the main texture of your material, this contains all the color information.
This information is stored using the image’s RGB channels. Each Channel contains color information creating the image.

Normal Map
Normal maps also look like they contain color information however each RGB channel contains a variety of different information, in this case, information used for our 3D rendering software to calculate lighting.
Switching through the normal maps RGB channels using Unreal Engine 5.1
You can see how each channel contains a different black-and-white (()-1 Colour Range) image showing different shadow angles.
- The Red channel represents the X-Axis showing the texture being lit from (Left or right).
- The Green channel represents the Y-axis showing the texture being lit from (Top or Bottom).
- The Blue channel represents the Z-axis showing the texture being lit from (straight on.).

Roughness
A rough texture is an image that only contains black-and-white information, these values range from 0.0 - 1.0
0.0 = Rough (Matte) = White
1.0 = Smooth (Shiny) = Black

AO (Ambient Occlusion)
Ambient Occlusion maps are similar to Roughness maps as in they only contain black-and-white information ranging from 0.0 -1.0.
However, this information is used to display shadow information that cant/won’t be effected by our 3d lighting system. You can see how it’s being used here to highlight the recessed areas of the stone work and small cracks where lighting would be difficult to reach.
Metallic Maps
Our brick material doesn’t contain any metal so it doesn’t have a metallic map or does it need one. MEtalic maps, again working from 0.0 to 1.0 color range are used.
Metalic maps work like a mask, to differentiate between the metal and none metal elements of our material.
https://substance3d.adobe.com/tutorials/courses/the-pbr-guide-part-2
Let’s take a look at Opacity masks.

Opacity Mask
An opacity mask is a black-and-white image, rather than ranging from 0.0-1.1 on the color range, Each pixel must be black or white.
White = Solid Colour
Black = Transparent.
In gaming we see these masks everywhere, specifically with foliage, We use them to let us make planes (Meshes) look more complex than they are.
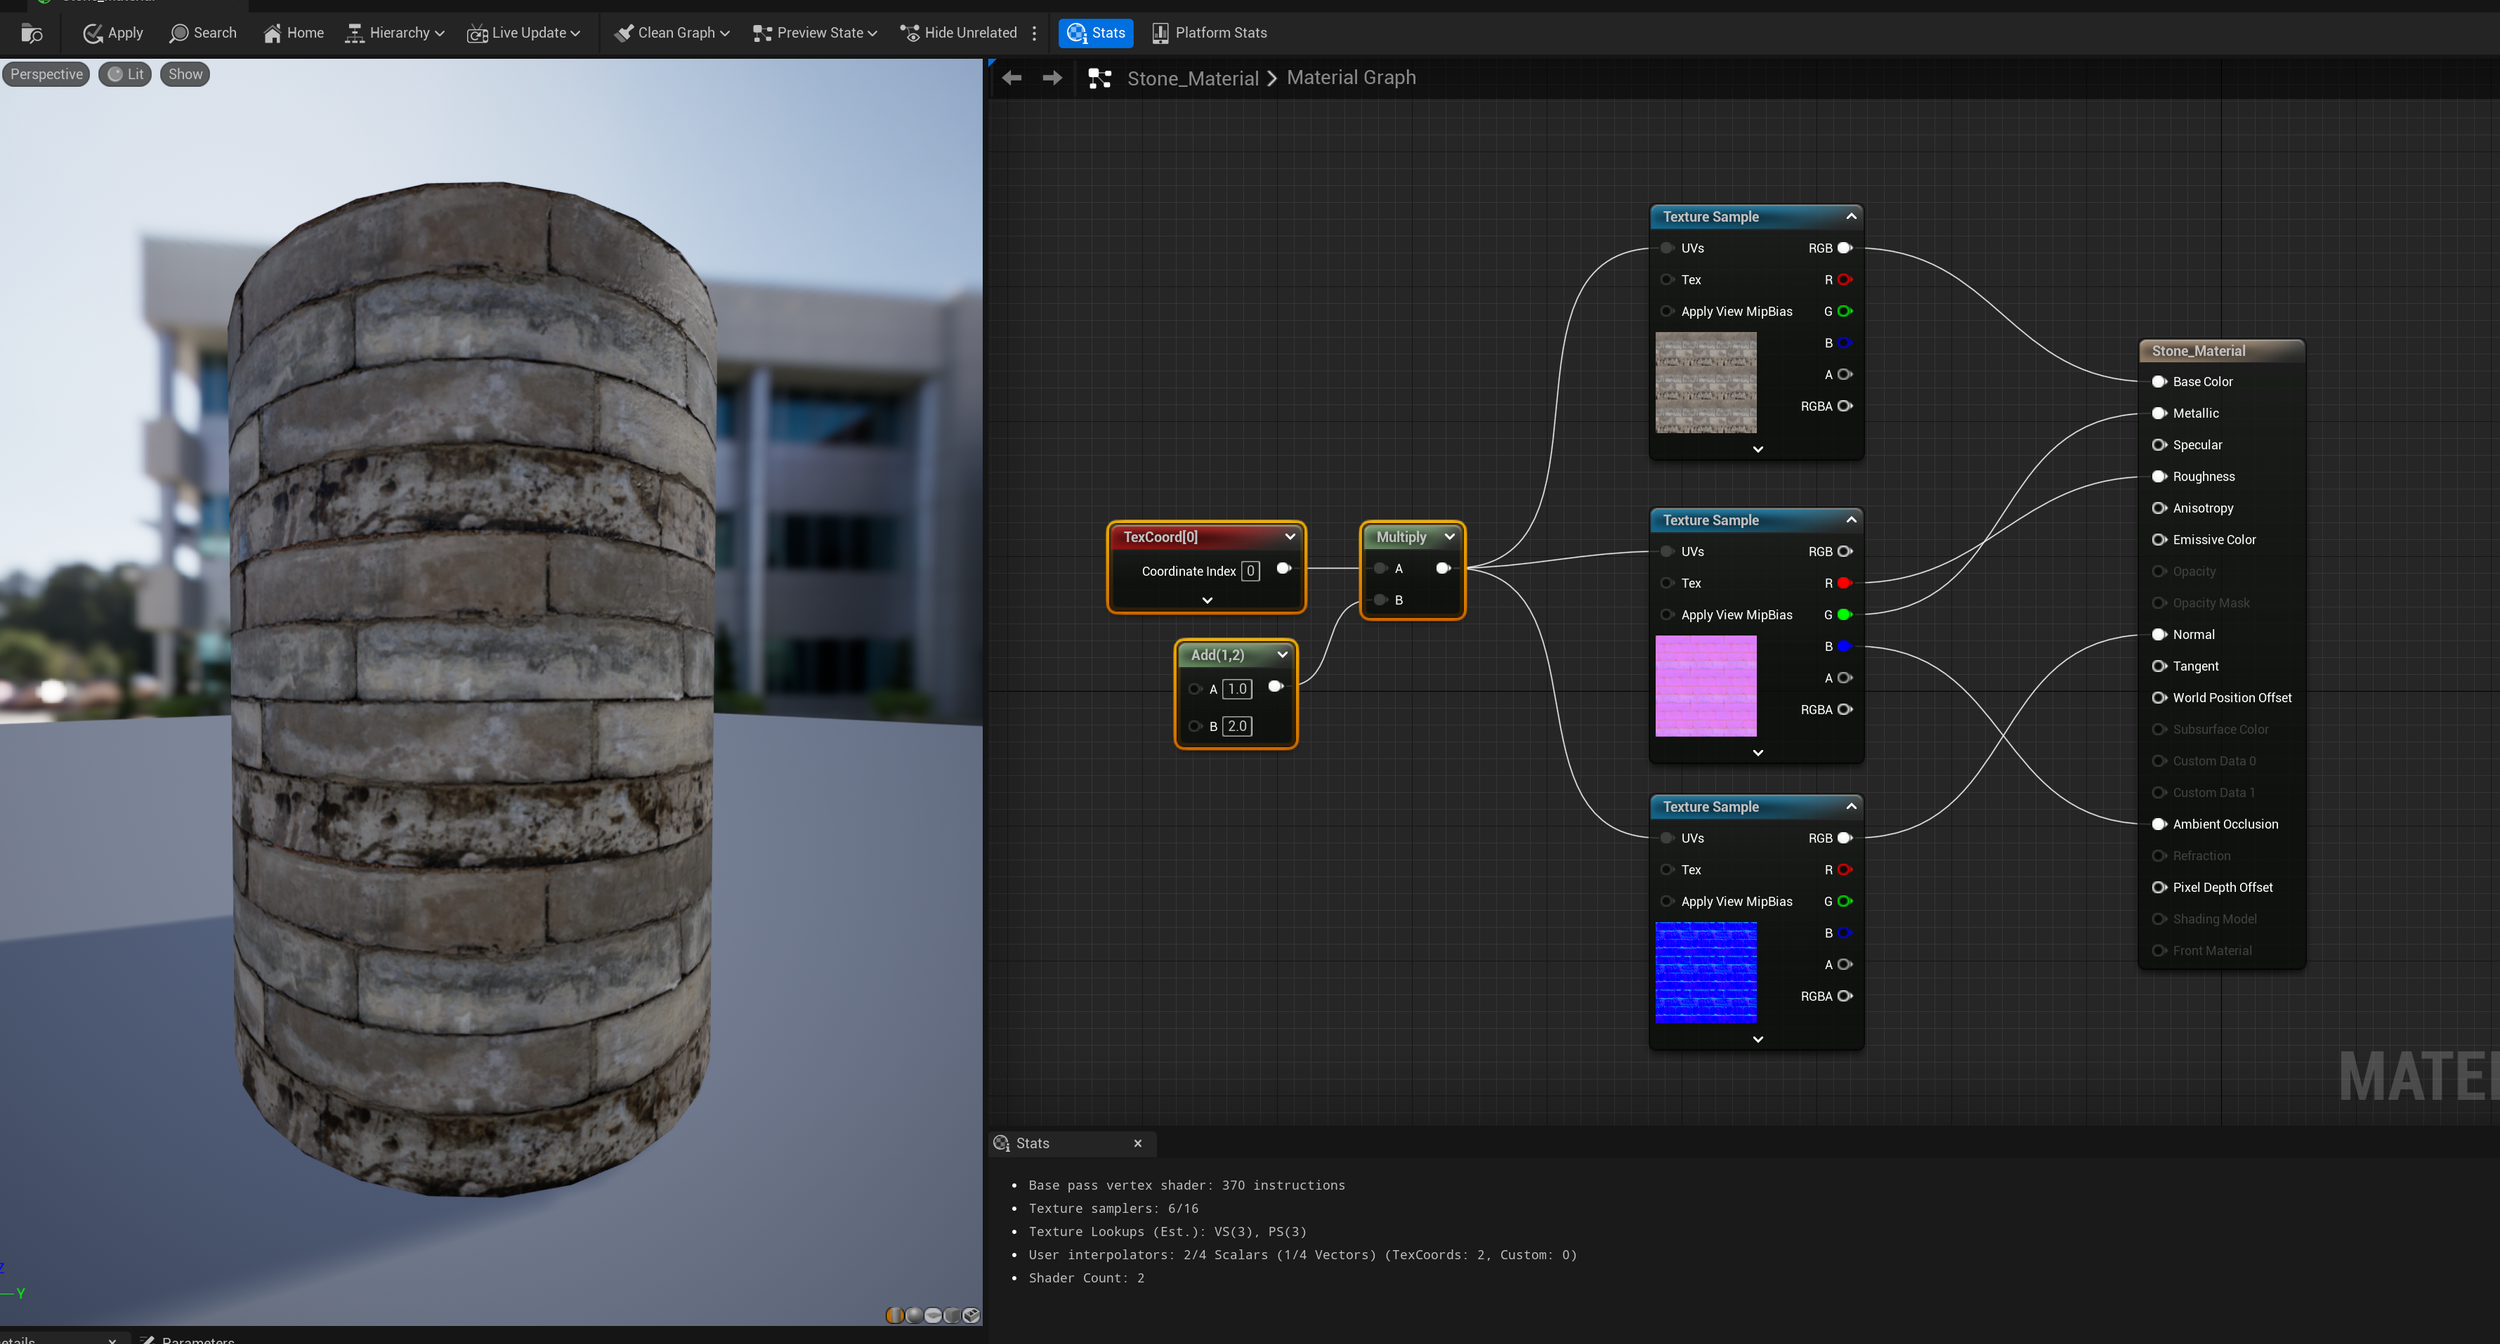
So how can these maps work together in a PBR material? I’ll be using Unreal Engine’s material editor to show them off. I am using a height map to take the place of the Metalic channel though as I want to show how we can do some optimization later on and it works well as a place holder.

Creating a PBR material using our texture maps.
You can see how combining the five individual textures, was able to get a pretty convincing wall material.
Keep note of the Texture samples of our material. Currently, it’s saying we are using 8 of our 16 samples.
Channel-packed textures.
So if we’re using a PBR workflow, the first thing we can do to optimize our materials is to pack some of them into a single texture. We can do this by combining our black-and-white textures, Roughness, metallic, AO. Each one of these only use 0-1 values which is the same information stored in an image’s individual RGB channel. So placing one of these textures in each channel can help to considerably reduce our sample count.
I used Photoshop to pack mine but applications like Substance Designer, Substance Painter, and Quixel suit can do this for you automatically.
Mine were separate so I did it manually.

Channel Packed Textures.
Channel-packed materials contain information for Roughness, Metallic, and Ambient occlusion, Or any texture information made of black and white textures.
Red channel = Roughness
Green Channel = Metalic
Blue Channel = Ambient Occlusion
You can see by combining our textures that the look of our material doesn’t actually change but out Texture Samples have been reduced by 2.
So what happens if we want to include an opacity mask?
In unreal i changed the Blend mode of our material to mask, this allows us to use the opacity mask channel of our material.

Opacity masked material
You can see how our opacity mask is used to display only a specific portion of our material, Anything in the black portion will be invisible and anything in white will be displayed.
Can we channel pack our opacity mask?
Yes, yes we can. Images can have a fourth channel alongside the original RGB channels, this is the A channel typically referred to as the Alpha Channel. Adding our opacity mask to this Alpha channel of our packed material brings our sample count back down to 6
The idea here is to be as efficient as possible with our materials, thinking about how to combine materials can save a considerable amount of memory based on the number of materials our project needs.
Having looked at the different types of textures available to use, we can look at optimizing them for Mobile devices. Let’s start by looking at texture resolution.
Correct Texture Resolution
When it comes to texture resolution, there isn’t much of a “Use this resolution because”. It really comes down to the use case. When it comes to desktop/console gaming with current-gen hardware, you can use textures up to 4096 x 4096. Unfortunately, With mobile VR we can’t use resolutions this large.
I’m going to focus on the Oculus Quest 2 as through experience with devices like the Vive Focus 3 these restrictions are similar.
By default, the Oculus Quest 2 has a default texture resolution of 2048x2048 or also known as 2k. This is great because it gives us much better quality however the downside comes down to the number of textures we can load into the level at runtime. My personal recommendation is to use trim sheets and atlases with a max resolution of 2k. Similar to Vader Immortal. But tiling textures if used should be around 1k or 1024x1024. The reason for suggesting this is down to the number of textures and materials on screen at once. All these materials need to be loaded when the level is. So loading multiple large textures at once can cause lag and frame rate issues. Trim sheets give us more bang for our buck, Vader immortal used almost only trim sheets. This allowed them to load fewer materials into memory but increase environmental details.
Vader Immortal shows how they use 2048x2048 textures.
https://www.youtube.com/watch?v=-q4phZ4He8A&ab_channel=AdamSavage%E2%80%99sTested
Not every texture has to be the same resolution.
When developing the Microsoft Azure app (Quest 2), our goal was to have as much quality as possible in our environments. In our case, the base color contained most of the information that our scene needed however some of our materials also used normal maps, in rare cases a material used a normal map. To improve performance as much as possible, I actually halved the resolution of the normal maps. So in this scene, Base color textures were set to 1024x1024 with normal maps being 512x512. This allows us to benefit from good-looking materials but has enough normal information visible to trick the viewer.
Masks can also be incredibly low resolution, Im talking about the black and white masks similar to the Opacity mask I showed above. Because they only contain black-and-white information, this means we only need to be concerned about the border of the mask.

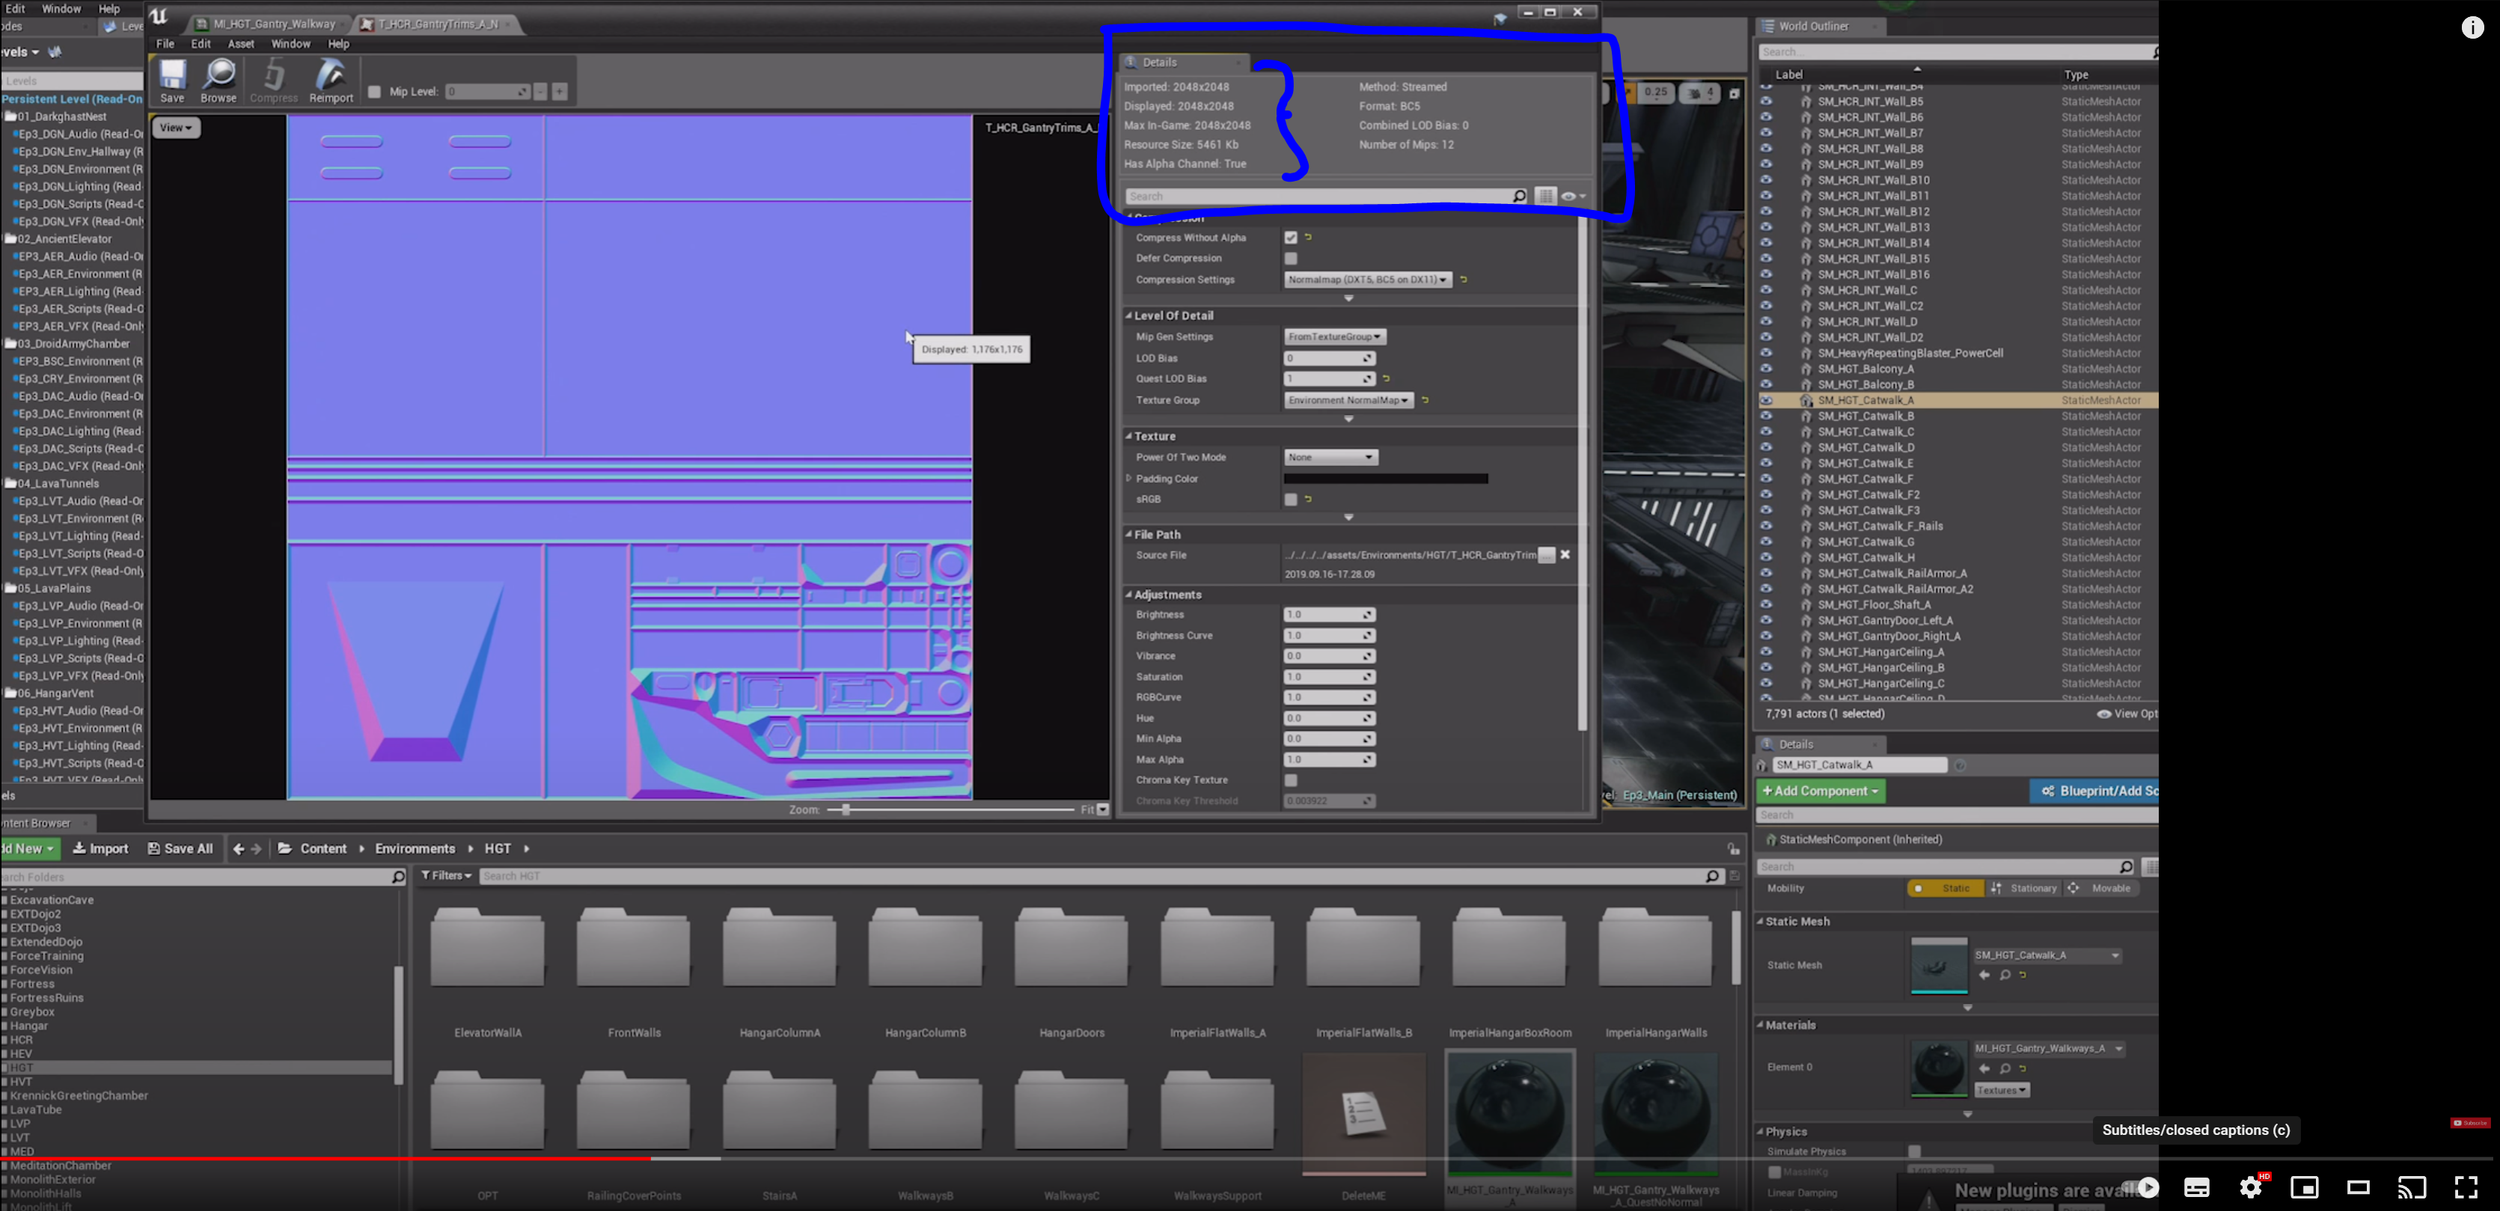
Changing texture resolution in the engine
Unreal Engine allows you to modify a texture’s resolution directly in the engine (Not at runtime), so if you bring in a texture that’s too large, you can use the internal tools to reduce the size by opening the texture in the editor and changing the Maximum Texture Size. I’ve also highlighted the details of the texture, These section provides real-time information on the texture. if you set the Maximum texture to a smaller scale, you will see your resources value change.
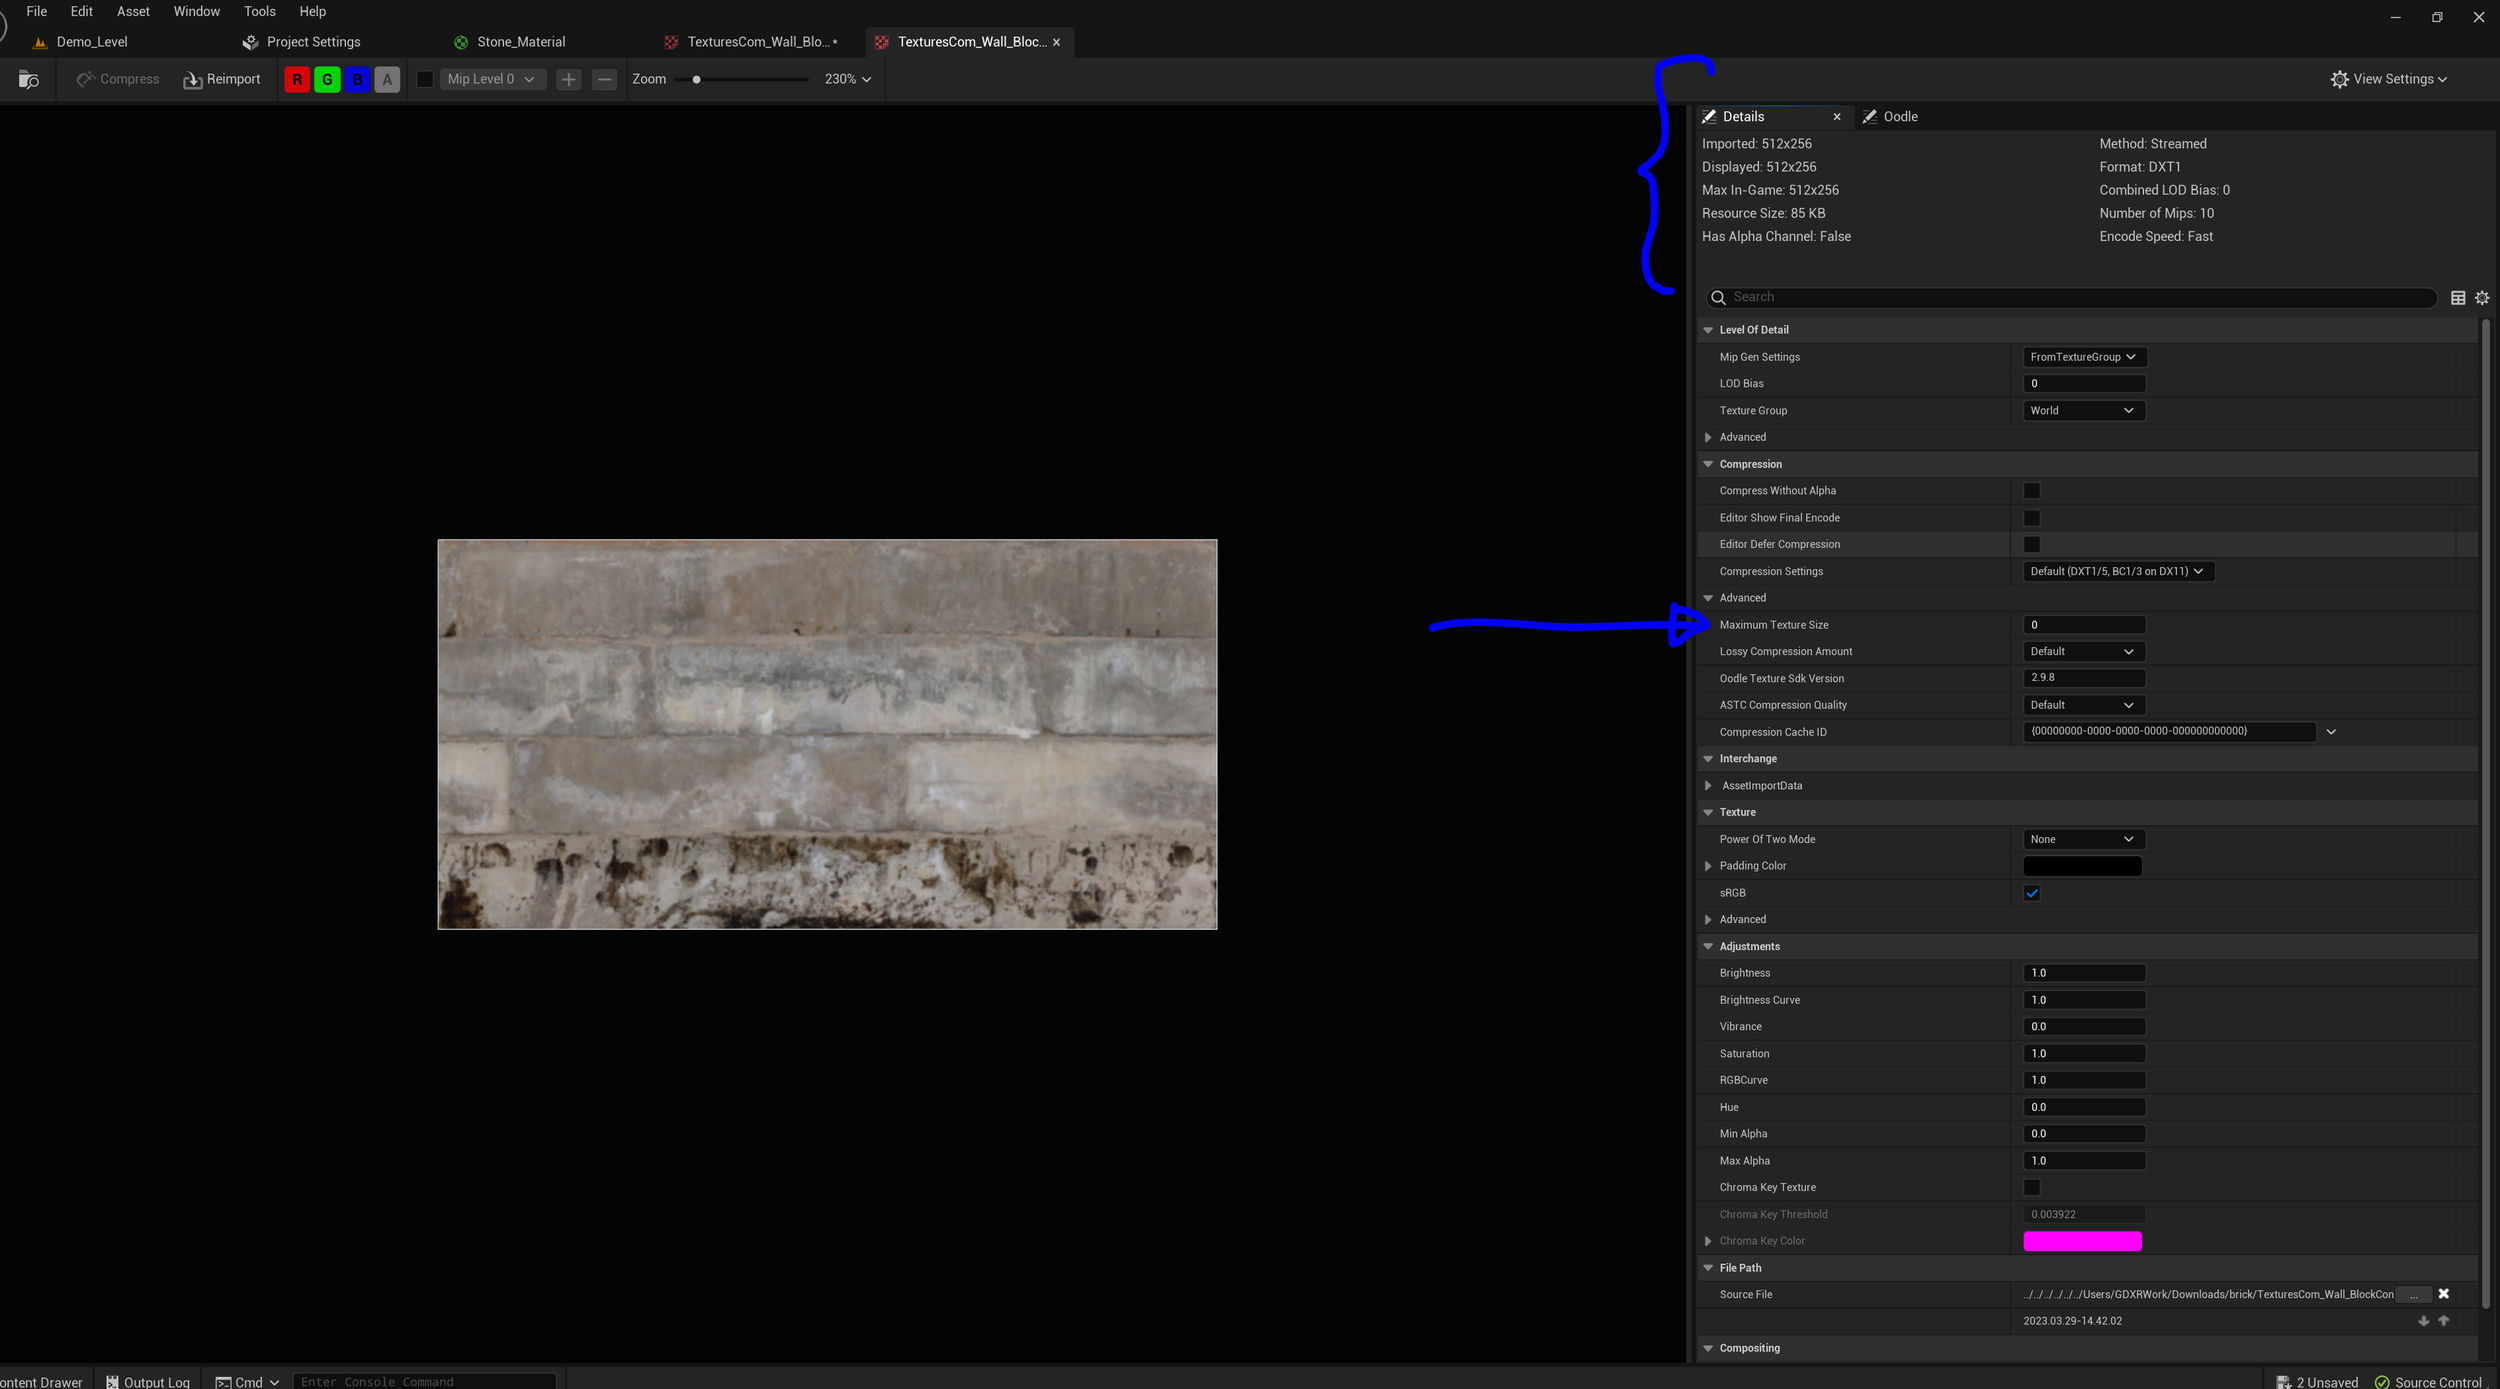
Using Maximum Texture size to reduce texture scale and memory.
By default, the value is set to 0 which equals the texture’s original size. Make sure to only use a power of 2.
If you want to change multiple textures at once, you can use Unreal Engines’ “Bulk Edit Via Property Matrix” Tool to do more at once.
- Select all the textures you want to modify in the content browser
- Right click > Asset Actions > Bulk Edit Via Property Matrix
- Click in the Window > CTRL+A to select all items in the list.
- Compression Drop down
- Change Maximum Texture Size to desired.
- Top left of the window File > Save All.

Use Fully Rough For Every Material
We have looked at roughness maps and how they work with a standard PBR workflow, however, most Mobile VR games don’t require them at all. Reflections on mobile can be extremely expensive. Just disabling the roughness of the material can allow you to get your frame rates up. Unreal has a very helpful setting to allow us to disable roughness.
You can see in the image below, I’m previewing my project’s scene using Shader Complexity View, which is used to display our shader instructions. Check out the Unreal Documentation for more info on the different view modes

Shader Complexity of the GDXR VR Temaplate

Our weapons have moderate complexity.

Weapons in the view port using roughness.
We can very clearly see our weapons laid out on screen and according to Epic games, our Shader instructions are creeping up to moderate complexity.
Since were targeting mobile VR we need this to be as low as possible and we don’t plan to have a reflection on our weapons, we can open the master materials and enable Fully Rough.

Just by enabling fully rough, our shader complexity has dropped all the way back to Ideal.

Weapons using fully rough
No visual difference. but better performance.
Emmisive Materials
When using Emmisive materials, people often forget to change the Materials Shading model, Unreal materials use the Default lit shading model, which allows meshes with the Default Lit shading model to bake lighting in the form of a light map. However, if your material is emissive, then it’s likely that a shadow won’t appear on the mesh.

Simple emissive material using the default shading Model. With Fully Rough Enabled.
If you look at our Instructions, you can see them sat at 365.

Setting shading model to unlit.
Unreal now tells us the base shader pass without lighting will now be 109 instruction.
Compress Without Alpha

Compress Without Alpha
By default Compress without Alpha is disabled,
Enabling Compress without Alpha, will remove the Alpha channel from the texture during Compression. This will change what compression formats you have access to.
Part 2 Coming Soon
To keep things manageable, I’m going to split this blog into multiple parts.
In part 2 I’ll be taking a look at:
Texture Compression
Mip Maps
Reducing Material IDs
Material Instances
Drawcalls and how to manage them
Other Tips
Make sure to drop by our Discord Server and check out our socials.